Linux Desktops and Published Applications are awesome! No Microsoft tax, lots of great free software, and MCS non-persistence!
What’s not great? Losing your profile every time that non-persistent machine reboots. And there isn’t any cool network profile storage like FSLogix available…….or is there?
I have been working on this design for years in my lab, and it works really well. Just so you know I am not a Linux trained engineer. I have to Google almost everything for proper Linux syntax. But I am learning, and according to GI Joe that’s half the battle (I think the other half is blue and red lasers.)
I know I need to work on tightening up my security for these type of profile share, and also look into possible vhdx mounts as well to match some of what FSLogix can do. But for now, this is what I do, and it has worked on CentOS(RIP), Rocky, Ubuntu, and Debian.
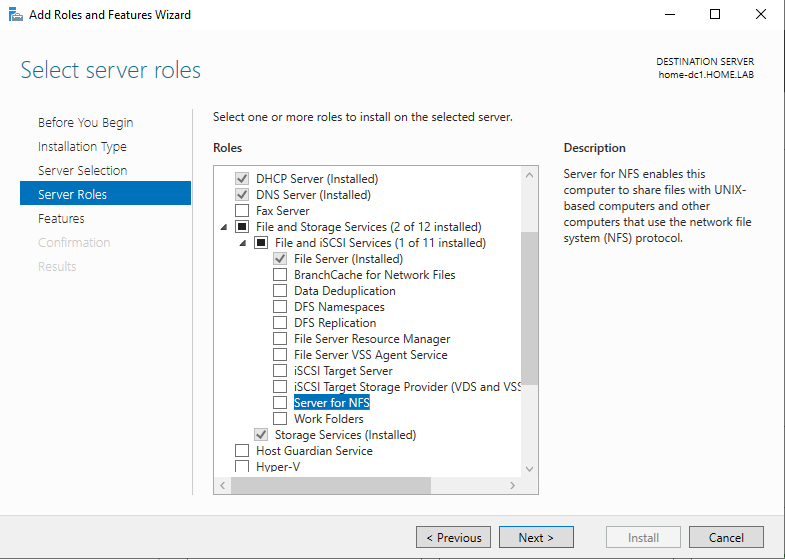
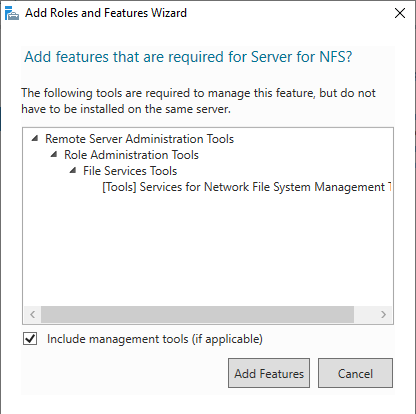
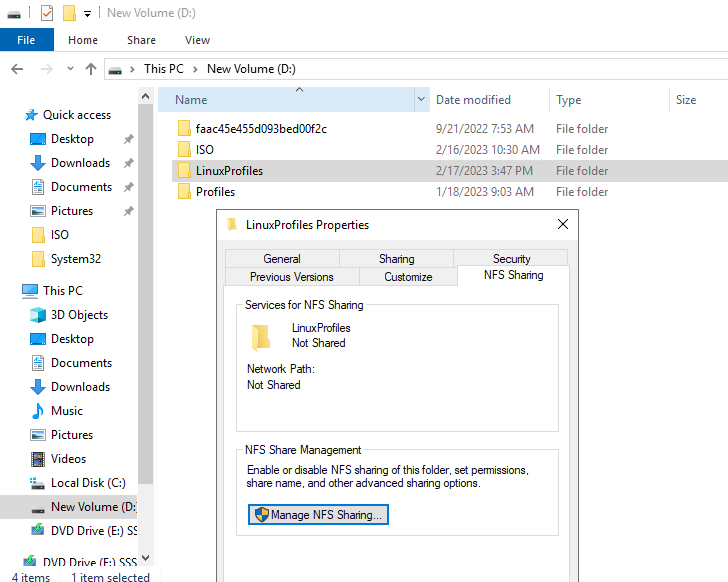
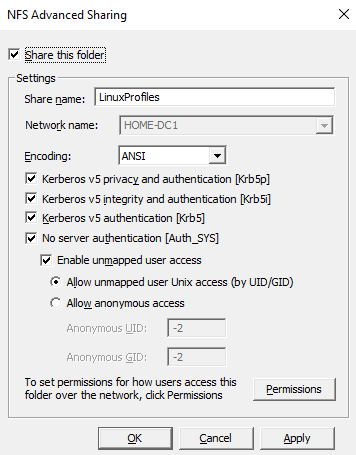
First we need to setup our Windows File Server to support NFS. I have tried CIFs in the past, but the authentication to actually mount the share always tripped things up. So I have stuck with NFS.
But what about redundancy? If you want you can place this NFS share on a DFS Replicated folder. Then I would utilize a NetScaler to load balances those 2 shares in an active:passive setup. But for this environment, I am just going to show how to utilize a single server share.


Now for the client side configuration. Samba should already be installed as part of the XenDesktop VDA client, but your mileage may vary. If you get errors, check to make sure all the necessary software components are installed. Ping me in the comments if you run into issues.
First, check to make sure you have NFS installed on your client. My Rocky Linux distro had it installed, but my Ubuntu build required me to install it.
Ubuntu:
sudo apt install nfs-common
Rocky:
sudo dnf install nfs-utils
Under the /home directory create an uppercase folder matching your NETBIOS domain name. For my domain of HOMELAB the following code does this.
sudo mkdir /home/HOMELABYour environment may setup AD home directories to be USERNAME@DOMAIN under the /home directory. This won’t work in the manner that we want. If your environment does this, this next section will switch it to how we want it.
On your Linux machine cli execute the following (or use a less capable text editor if you want)
sudo nano /etc/samba/smb.confAdd a comment mark (#) in front of the following line if it is there, then save and exit that text editor. This will create the necessary home folder as NETBIOS/USERNAME instead of USERNAME@DOMAIN
template homedir = /home/%U@%DNow edit your /etc/fstab to setup the mount point
sudo nano /etc/fstabAdd your NFS share to that /home/NETBIOS mount point at the end of your fstab file. Here is an example from my HOMELAB
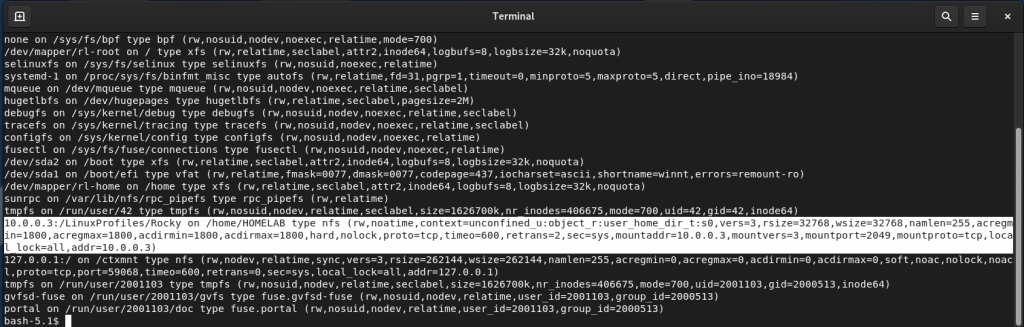
10.0.0.3:/LinuxProfiles/Rocky /home/HOMELAB nfs vers=3,nofail,noatime,nolock,intr,tcp,actimeo=1800,context="unconfined_u:object_r:user_home_dir_t:s0" 0 0Now save the fstab file and reboot your Linux Machine.
Now when you login to this machine as a local root account and run a mount command you should see your NFS share mounted to /home/NETBIOS.
Now that the folder has been created go ahead and go through the MCS deploy process for a non-persistent machine.
Once the desktop has been deployed login to the Linux session. Once you hit your Desktop, take a look at the folder on the file server. You will now see your home folder fully populated with all your session data.
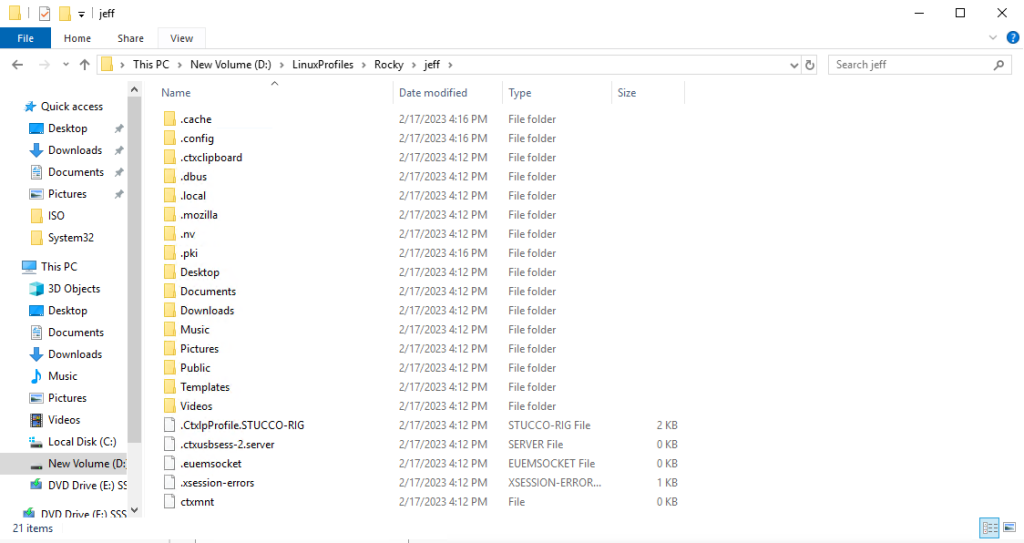
You have successfully roamed your profile! That machine can reboot, revert, or be upgraded, and you always will have your profile when you next login.
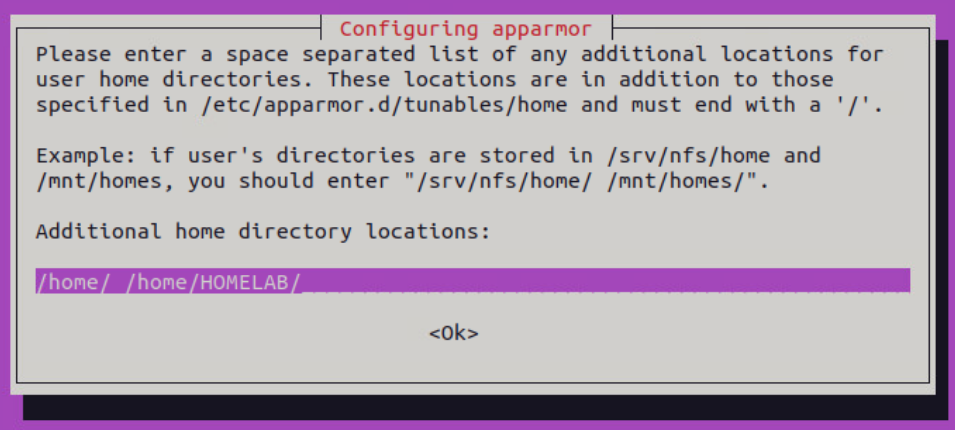
If you notice that applications don’t launch on your new profile, you may need to modify your SNAP permissions. Login to your linux image with your admin account and run the following command.
sudo dpkg-reconfigure apparmorAdd your home directories as I did in my example and SNAP apps will work correctly.